Turning a pen – in wood

One of my passions is wood turning, from bowls and pots to spindles and tool handles but just lately it has become pen making, with a few specialist tools and lots of off cuts of wood within minutes you can create a wonderful item that will give much enjoyment. So here I will share a little how to and hope that it helps others to find the joy I get from making these,
First we start with the style of pen , there are many on the market from slim line to euro, some are fat some are thin and they all start out life as a kit which usually consists of brass tubes, a tip, a ring and an end, from there the next thing is to decide on wood or acrylic or wood, although I have made both i prefer wood its far more tactile and brings a personal touch to the pen.
 Once decided we need to source a blank these can come ready cut or you can prepare your own they need to be roughly 20mm thick and about 150mm long, this is then cut in to two pieces the same length as the brass tubes included in the kit. From here, a hole is drilled through dead centre of the length of the blank to the diameter of the tube (usually about 7 mm ) and the tubes are then glued in place. Once the glue is dry, they are ready to be mounted on the lathe , for this I use a pen mandrill , there are other ways to mount it but this makes it so easy. The mandrill comes with spacers that help gauge the size you need to turn the blank down to in order to make the metalwork fit flush.
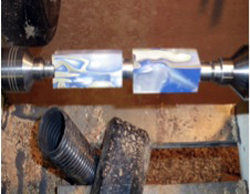
Then it's a case of turning the blank down to the desired size first by roughing it down then using a skew to finely cut and shave it to the shape and size, I find that spinning the lathe as fast as I dare for this bit helps give me a really smooth finish as well as having a very sharp skew.
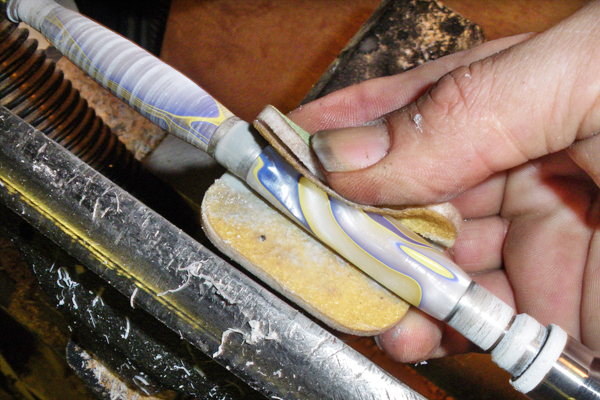
Once the desired shape has been cut and smoothed, it's time to polish. I usually start with a 220 grit paper and then work through the grits up to about 1200. A good tip is to not let your paper get to hot as this dulls the cutting surface of your paper and can put a false shine on to the pen. When you have it smoothed to the desired shine, it's time to coat the piece to protect it. I usually use bees wax to do this as it give the pen a nice feel but there are many products you can use such as super glue for a high shine or oils to nourish the wood.
 The assembly process.
Remove the blanks from the lathe and find how they line up, by this I mean how the pattern or grain fits together, then begin to put all the pieces together. First, start with the tip and using a vice force the tip in to the end of the brass tube and blank, then in the other end of this push in the mechanism i.e. the twist or click bit, making sure it's the right way round, most of these have a brass end to indicate which end to insert.
This needs to be done slowly as it only needs pushing in a small amount to allow the ink cartridge tip to fit nicely through the tip of the pen, then take the other blank and push in the cap and clip using the same method. Most pen kits come with assembly instructions to make life a bit easier but if they don't they are all available by contacting your supplier.
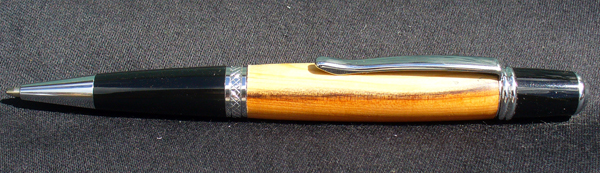
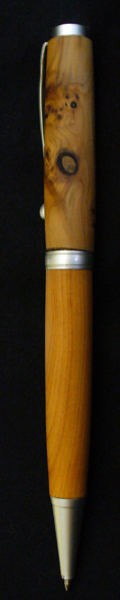
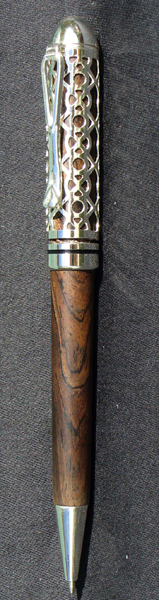
There you have it - a wonderful pen made as uniquely as you wish
If you are interested in commissioning a pen, or indeed any other wood based product, please do contact me. Hopefully, I will have a website up and running soon, but until then please contact me if you are interested. My email is: stumurdoch_241(at)hotmail.com
Happy turning
Comments are closed for this post.
Discussion
See last para of blog
“If you are interested in commissioning a pen, or indeed any other wood based product, please do contact me. Hopefully, I will have a website up and running soon, but until then please contact me if you are interested. My email is: stumurdoch_241(at)hotmail.com“
hi i am looking to buy my brother a wood turned pen for christmas where can i buy one from you there are lots online but they are from the us.
Hi Stu
I did send you an e-mail – not sure if it got to you?
Cheers.
hi Giles
thank you very much
yeah sure in wood,acrylic or polyester ( which can be coloured to look like antler )
if your interested email me at the address at the bottom of the blog and i can send you pictures of the styles and what sort of prices they are
many thanks stu
Nice work. Can you turn a fountain pen in a similar fashion, or ballpoint only?
thank you Ashley
Your pens would make lovely gifts. Thank you for sharing this with us!

Hello
The reason why i am writing this to you my Dad designed pens and wood working he not long past away in his will he left the whole pen kits lathe to my hubbie but he was learning just the basic but he is having so much trouble he can turn the pen but he getting it all wrong he cuts the blank then drills the holes brass tubes he sands down he glues the tube in the hole of the blank he uses what bushing he think is right when he shaped the blanks and sand downs the pen casing does fit the wood but he really trying so hard but failing aswell my dad showned him just little basics and i don’t know myself he need help i live in cornwall just a thought if your near by could he visit your work shop as perhap show him where he going wrong he read book and mags and tube tube channel please help
Pauline
21 November, 2019